Unity için 3D Solucan Denetleyici Eğitimi
Bu eğitimde, TornadoTwins başlangıç düzeyindeki oyun geliştirme eğitim serisinden ilham alarak Unity'te basit bir solucan denetleyicisinin nasıl oluşturulacağını göstereceğim.
Solucan denetleyicisi düzgün bir kuyruk takip efektiyle etrafta kayacak ve zıplama yeteneğine sahip olacak.
Bu eğitimdeki komut dosyaları orijinal olarak artık desteklenmeyen JavaScript'te (diğer adıyla UnityScript) yazılmış olduğundan bir C# alternatifi sunacağım.

Unity'te bir solucan denetleyicisi oluşturmak için ihtiyacımız olacak:
- Gerekli komut dosyalarını oluşturun
- Bir solucan karakteri oluşturun
- Komut dosyalarını karaktere atayın
Adım 1: Gerekli tüm komut dosyalarını oluşturun
Bir solucan denetleyicisi kurmak için ihtiyaç duyulacak tüm komut dosyalarını oluşturarak başlayalım:
- yeni bir komut dosyası oluşturun, onu "SC_WormController" olarak adlandırın ve içine aşağıdaki kodu yapıştırın:
SC_WormController.cs
using System.Collections;
using System.Collections.Generic;
using UnityEngine;

[RequireComponent(typeof(CharacterController))]
public class SC_WormController : MonoBehaviour
{
    public float speed = 3.0f;
    public float rotateSpeed = 1.0f;
    public float jumpSpeed = 5.0f;
    public float gravity = 9.8f;

    CharacterController controller;
    Vector3 moveDirection;

    // Start is called before the first frame update
    void Start()
    {
        controller = GetComponent<CharacterController>();
    }

    // Update is called once per frame
    void Update()
    {
        // Rotate around y - axis
        transform.Rotate(0, Input.GetAxis("Horizontal") * rotateSpeed, 0);

        // Move forward / backward
        Vector3 forward = transform.TransformDirection(Vector3.forward);
        float curSpeed = speed * Input.GetAxis("Vertical");
        float movementDirectionY = moveDirection.y;
        moveDirection = forward * curSpeed;

        // Jumping
        if (Input.GetButtonDown("Jump") && controller.isGrounded)
        {
            moveDirection.y = jumpSpeed;
        }
        else
        {
            moveDirection.y = movementDirectionY;
        }

        // Apply gravity. Gravity is multiplied by deltaTime twice (once here, and once below
        // when the moveDirection is multiplied by deltaTime). This is because gravity should be applied
        // as an acceleration (ms^-2)
        if (!controller.isGrounded)
        {
            moveDirection.y -= gravity * Time.deltaTime;
        }

        // Move the controller
        controller.Move(moveDirection * Time.deltaTime);
    }
}- Yeni bir komut dosyası oluşturun, onu "SC_CameraFollow" olarak adlandırın ve içine aşağıdaki kodu yapıştırın:
SC_CameraFollow.cs
using System.Collections;
using System.Collections.Generic;
using UnityEngine;

public class SC_CameraFollow : MonoBehaviour
{
    /*
    This camera smoothers out rotation around the y-axis and height.
    Horizontal Distance to the target is always fixed.

    There are many different ways to smooth the rotation but doing it this way gives you a lot of control over how the camera behaves.

    For every of those smoothed values we calculate the wanted value and the current value.
    Then we smooth it using the Lerp function.
    Then we apply the smoothed values to the transform's position.
    */

    // The target we are following
    public Transform target;
    // The distance in the x-z plane to the target
    public float distance = 10.0f;
    // the height we want the camera to be above the target
    public float height = 5.0f;
    // How much we
    public float heightDamping = 2.0f;
    public float rotationDamping = 3.0f;

    void LateUpdate()
    {
        // Early out if we don't have a target
        if (!target)
            return;

        // Calculate the current rotation angles
        float wantedRotationAngle = target.eulerAngles.y;
        float wantedHeight = target.position.y + height;
        float currentRotationAngle = transform.eulerAngles.y;
        float currentHeight = transform.position.y;

        // Damp the rotation around the y-axis
        currentRotationAngle = Mathf.LerpAngle(currentRotationAngle, wantedRotationAngle, rotationDamping * Time.deltaTime);

        // Damp the height
        currentHeight = Mathf.Lerp(currentHeight, wantedHeight, heightDamping * Time.deltaTime);

        // Convert the angle into a rotation
        Quaternion currentRotation = Quaternion.Euler(0, currentRotationAngle, 0);

        // Set the position of the camera on the x-z plane to:
        // distance meters behind the target
        transform.position = target.position;
        transform.position -= currentRotation * Vector3.forward * distance;

        // Set the height of the camera
        transform.position = new Vector3(transform.position.x, currentHeight, transform.position.z);

        // Always look at the target
        transform.LookAt(target);
    }
}- yeni bir komut dosyası oluşturun, onu "SC_SmoothFollow" olarak adlandırın ve içine aşağıdaki kodu yapıştırın:
SC_SmoothFollow.cs
using System.Collections;
using System.Collections.Generic;
using UnityEngine;

public class SC_SmoothFollow : MonoBehaviour
{
    // The target we are following
    public Transform target;
    // The distance in the x-z plane to the target
    public float distance = 10.0f;
    // the height we want the camera to be above the target
    public float height = 5.0f;
    // How much we
    public float heightDamping = 2.0f;
    public float rotationDamping = 3.0f;

    // Start is called before the first frame update
    void Start()
    {
        if (!target) return;

        transform.LookAt(target);
    }

    void LateUpdate()
    {
        // Early out if we don't have a target
        if (!target) return;

        // Calculate the current rotation angles
        float wantedRotationAngle = target.eulerAngles.y;
        float wantedHeight = target.position.y + height;

        float currentRotationAngle = transform.eulerAngles.y;
        float currentHeight = transform.position.y;

        // Damp the rotation around the y-axis
        currentRotationAngle = Mathf.LerpAngle(currentRotationAngle, wantedRotationAngle, rotationDamping * Time.deltaTime);

        // Damp the height
        currentHeight = Mathf.Lerp(currentHeight, wantedHeight, heightDamping * Time.deltaTime);

        // Convert the angle into a rotation
        var currentRotation = Quaternion.Euler(0, currentRotationAngle, 0);

        // Set the position of the camera on the x-z plane to:
        // distance meters behind the target
        transform.position = target.position;
        transform.position -= currentRotation * Vector3.forward * distance;

        // Set the height of the camera
        transform.position = new Vector3(transform.position.x, currentHeight, transform.position.z);

        // Always look at the target
        transform.LookAt(target);
    }
}
Adım 2: Solucan Karakteri Oluşturun
Bir sonraki adım bir solucan karakteri oluşturmaktır:
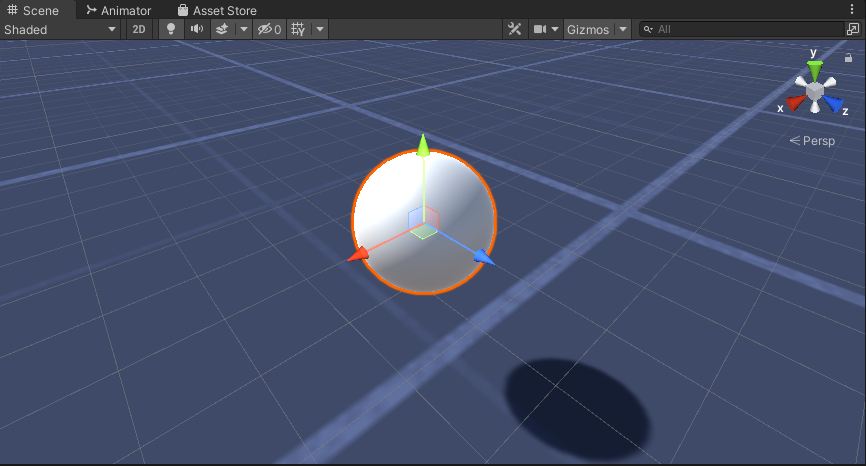
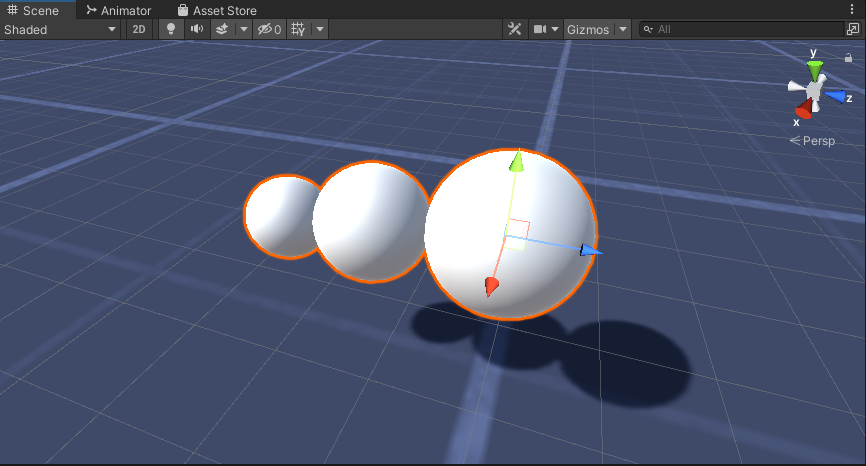
- Yeni bir Küre oluşturun (GameObject -> 3D Object -> Sphere) konumunu (0, 0, 0) olarak değiştirin, SphereCollider bileşenini silin ve şu şekilde yeniden adlandırın: "Worm"
- "Worm" küresini çoğaltın, "BodyPart1" olarak yeniden adlandırın, konumunu (0, -0,1, -0,9) ve ölçeğini (0,8, 0,8, 0,8) olarak değiştirin
- "Worm" küresini tekrar kopyalayın, "BodyPart2" olarak yeniden adlandırın, konumunu (0, -0,2, -1,6) ve ölçeğini (0,6, 0,6, 0,6) olarak değiştirin
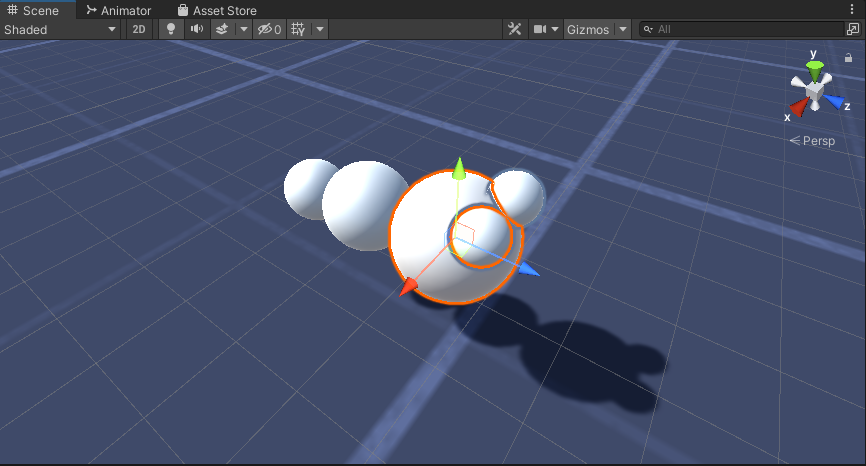
- "Worm" nesnesine sağ tıklayın -> Boş Oluştur ve yeni oluşturulan nesneyi şu şekilde yeniden adlandırın: "Eyes"
- "BodyPart2" küresini çoğaltın, "Eye" olarak yeniden adlandırın ve "Eyes" nesnesinin içine taşıyın, konumunu (-0,24, 0,353, 0,324) olarak değiştirin ve ölçeğini (0,4, 0,4, 0,4) olarak değiştirin
- "Eye" küresini çoğaltın ve X konumunu 0,24 olarak değiştirin
- Görselleştirme için birkaç malzeme oluşturabilirsiniz; örneğin vücut için yeşil, gözler için mavi.

Solucan Karakteri hazır.
3. Adım: Solucan Denetleyicisini Kurun
Son adım, komut dosyalarını atamaktır:
- SC_CameraFollow komut dosyasını Ana Kamera nesnesine ekleyin ve "Worm" Sphere'i hedef değişkene atayın:

- SC_WormController betiğini "Worm" küresine ekleyin (Otomatik olarak CharacterController adında başka bir bileşen ekleyecektir):

- SC_SmoothFollow komut dosyasını "BodyPart1" küresine ekleyin ve değerlerini aşağıdaki ekran görüntüsü ile aynı şekilde ayarlayın:

- SC_SmoothFollow komut dosyasını "BodyPart2" küresine ekleyin ve değerlerini aşağıdaki ekran görüntüsü ile aynı şekilde ayarlayın:

Kontrol cihazı artık hazır; hareket etmek için W, A, S ve D'yi, atlamak için ise Space'i kullanın.
Kaynak Unity Paketi aşağıda mevcuttur.